1. Log into Filevine account and select a project. Keep in mind that only the Admin user will be able to make the following configuration on the Filevine account.
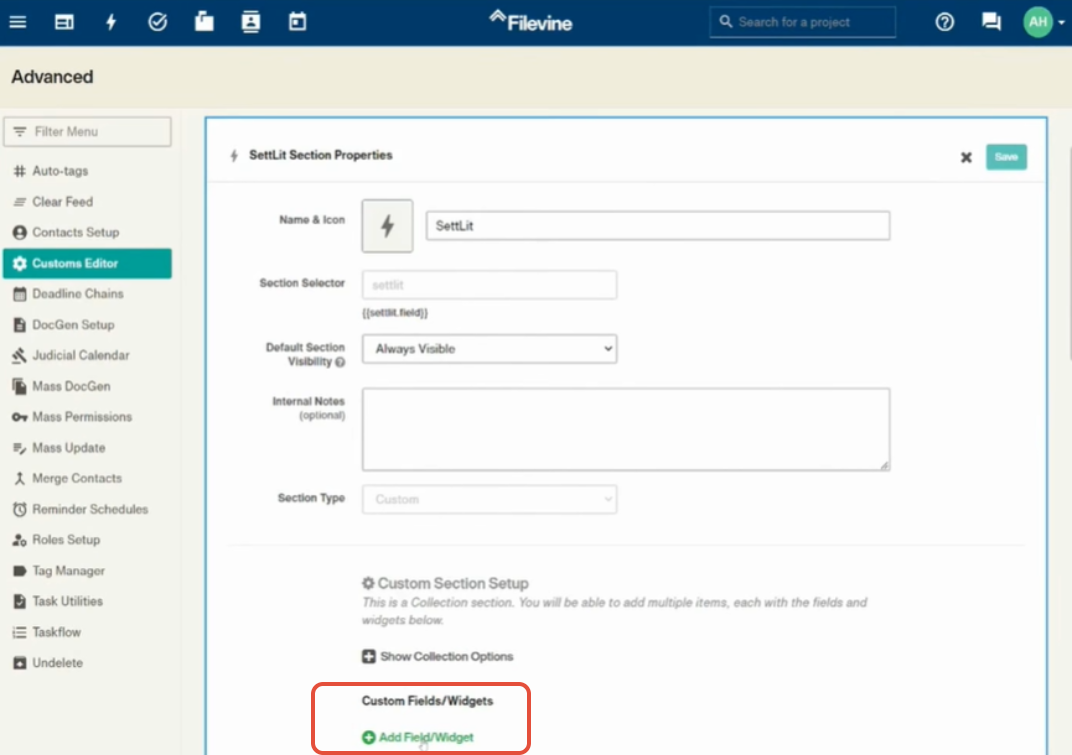
2. Select the hamburger menu on the top right corner and select Advanced. Then select Customs Editor and choose the specific project you will be creating data queries.

3. Select Create New Section where you will confirm the Collection box is checked. Input the SettLiT information as shown. Select Save.

4. Choose Add Field Widget button and follow the series of entries below:
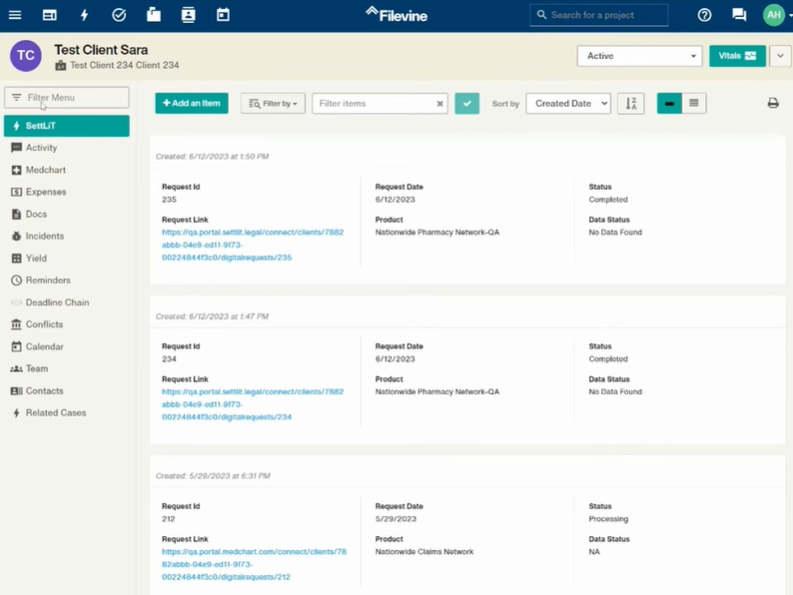
- In the drop down select Text-Single Line, Field Prompt as Request ID and Field Selector as "requestid". Select Create.
- Create another one and in the drop down select URL Field Type. The field prompt will be Request Link and the Field Selector will be "url". Select Create.
- The next Field type will be Date. Type in the field prompt to be Request Date. The field selector will be called "date". Select Create.
- The next Field type will be Text - Single Line. Type in the field prompt to be Product. The field selector will be called "product". Select Create.
- The next Field type will be Text - Single Line. Type in the field prompt to be Status. The field selector will be called "status". Select Create.
- The next Field type will be Text - Single Line. Type in the field prompt to be Data Status. The field selector will be called "datastatus". Select Create.
- The last one is Field type URL. Type in the field prompt to be Data Link. The field selector will be called "dataurl". Select Create.

Video Tutorial
If you have questions or feedback, please feel free to reach out to us at support@settlit.legal.