SmartAdvocate and SettLiT have partnered on this integration.
- SettLiT team will need to provide the customer with the API Key for integration
Step 1: Open SmartAdvocate Intake Wizard & register the new client.
![]()
A) Add Case Group, Case Type, and Case Sub Group.
B) Add Plaintiff Information
C) Under Organization, Choose SettLiT

NOTE: All required fields in SettLiT are also required on the Plaintiff profile on SmartAdvocate. If not all fields are completed, it will be marked as Rejected.
Step 2: Add Incident Details

Step 3: Select Generate.

The client profile will now be created on SmartAdvocate.

Step 4: Add SettLiT as a Provider using the drop down menu or type in SettLiT under provider.
NOTE: This process of adding SettLiT as a provider only occurs the first time it is used. You do not have to add the provider for any subsequent client.


A) Add Who is Assigned to the request.
B) Add Record Type as Digital Query.
C) Add Status as SettLiT Pickup.

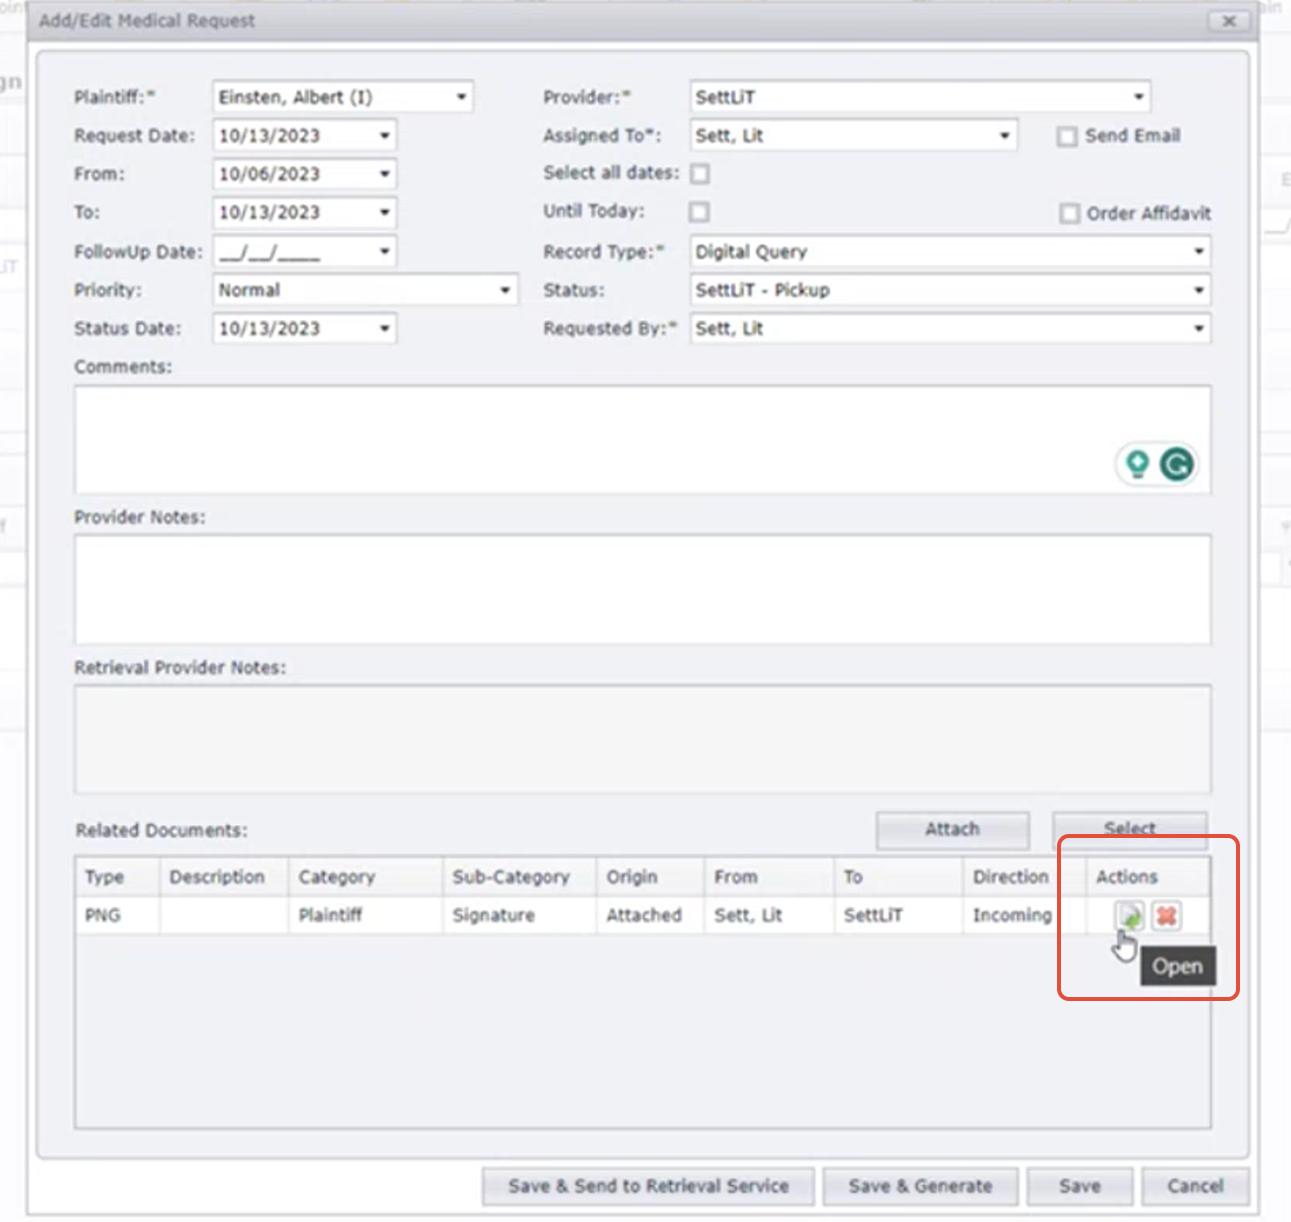
Step 5: Attach the client signature to this request (if it is the first request for this specific client)
A) Drop signature as attachment by selecting Browse
B) Choose Direction as Incoming
C) Choose Delivery Method as eFile
D) Choose Sub-Category as Plaintiff, Signature
E) Choose Category as Plaintiff
F) Choose Sub-Category as Signature
G) Select From as the "User" and To as "SettLiT"
H) Select Save

I) You will have the option to delete or open to view the signature that was uploaded under Actions.
Step 6: Select Save

The Digital Request is now created.
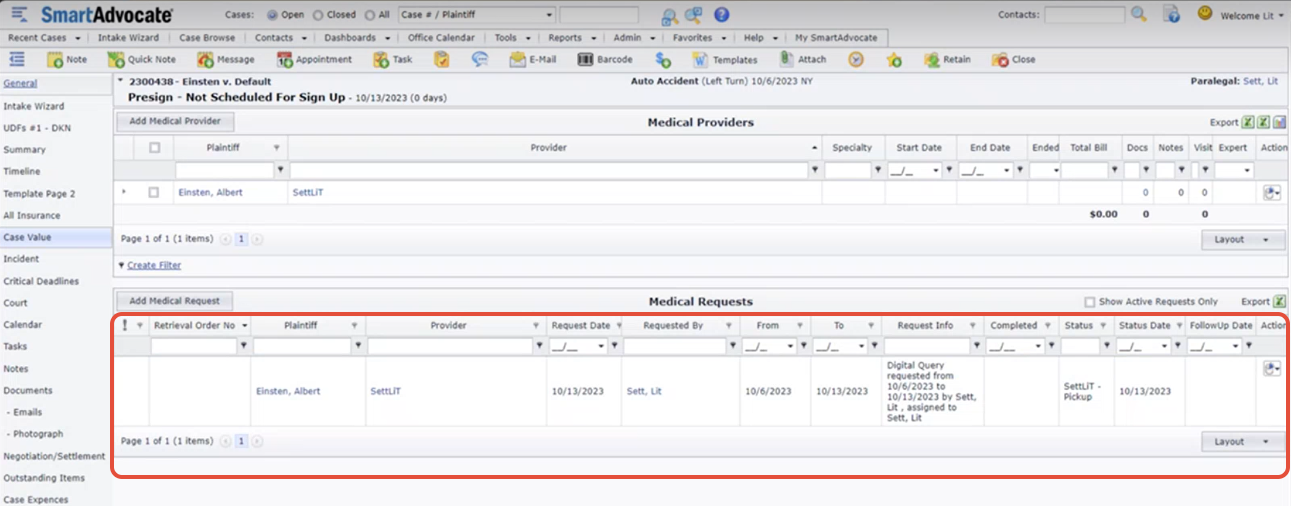
Step 7: The status will change from SettLiT - Pickup to SettLiT - Progress. This means that the client has now been created on the SettLiT portal and the digital request is in progress.
The completed request will show as SettLiT - Completed. 
When the request is completed, the data will import into the SmartAdvocate client profile under Documents.
Step 8: Navigate to Documents. Select the Action button on the Data file of the digital query.

Open for Edit will allow you to view all of the data synced to SmartAdvocate through the SettLiT FHIR Viewer:

Congratulations! You are all set! Our Sales and Customer Success teams will see to integrating your account and will be in touch with next steps.
If you have questions or feedback, please feel free to reach out to us at support@settlit.legal.